Drywall damage frequently occurs in homeownership due to moving furniture and everyday wear. Repairing walls is feasible for both DIYers and professionals, with skilled work making imperfections nearly invisible. For complicated issues, it’s advisable to hire a reputable drywall specialist. The guide provides practical advice for fixing small dents or larger areas, focusing on durability and a smooth finish. Effective drywall repair goes beyond concealing damage; it involves proper techniques and quality materials to seamlessly blend repairs. Every step, from prepping and applying to matching textures and painting, is essential. This walkthrough covers each stage and indicates when professional assistance is necessary. With patience, the right tools, and a structured approach, you can restore and even enhance your home’s appearance and value.
Table of Contents
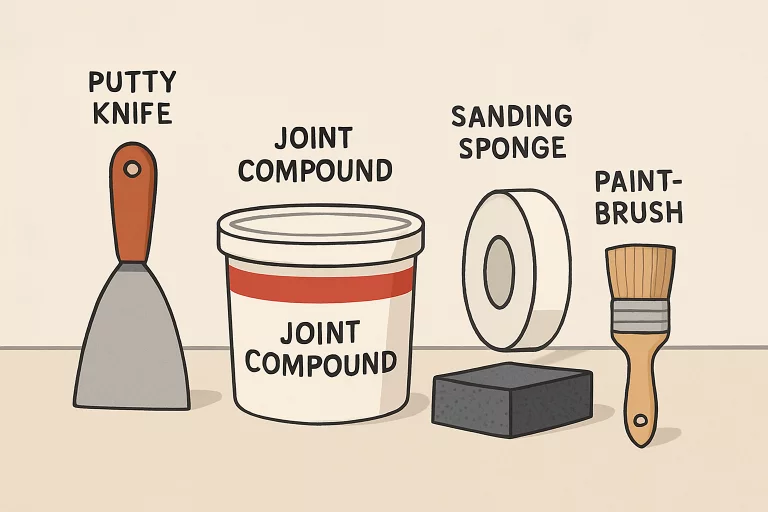
Gather the Necessary Tools and Materials
Every successful drywall repair, often carried out by skilled drywall repair contractors, starts with a good toolkit. Having the right supplies saves time and prevents mistakes. Here’s what you need for drywall restoration: joint compound for filling holes and cracks, with all-purpose and quick-setting types; drywall tape to reinforce joints, either paper or fiberglass mesh; putty knives in various widths for different tasks; fine-grit sandpaper or sponges for smoothing, plus dust masks for protection; primer and paint to blend and protect the wall. Preparing your toolkit ensures a smoother, stress-free repair with professional results.
Prepare the Damaged Area
A meticulous setup is pivotal for flawless drywall repairs. Beginning with a clean, well-prepared area ensures that new compound adheres tightly, patches fit securely, and unsightly seams remain hidden over time. Here’s how to prime your repair site:
- Clean the area by wiping it down with a damp cloth or sponge and removing any dust, grease, or peeling paint. Even the smallest residue can interfere with the joint compound’s ability to bond.
- Trim damaged sections across the break using a sharp utility knife for a straight, solid edge. This allows your new patch or compound to bind firmly, eliminating weak points that might fail later.
- Secure proper backing when repairing larger holes, such as those created by doorknobs or accidents. Attach a small piece of scrap wood behind the wall using drywall screws—this step offers a stable support structure, preventing your patch from sagging or cracking under pressure.
Attending to these details before applying any repair materials lays the essential groundwork for results that are both beautiful and long-lasting.
Apply Drywall Tape and Joint Compound
This stage is where your repair starts to take form, and the proper technique will determine how invisible the patch appears:
- Spread a thin, even coat of joint compound over the damaged area, ensuring you feather out the edges for a gradual transition to the wall surface.
- Apply drywall tape directly onto the wet compound, pressing it down so it bonds tightly without air pockets. This crucial reinforcement prevents cracks from reappearing as the wall settles over time.
- Cover the tape with additional coats of joint compound, feathering each new layer slightly beyond the previous one. The aim is to build up just enough thickness to hide the repair without creating humps or ridges.
- Let each coat dry completely before applying the next one, according to the manufacturer’s instructions. Trying to save time by rushing this process can lead to future cracking, bubbling, or sinking repairs.
These steps serve to camouflage the repair securely, maintaining both structural integrity and a flawless visual finish.
Sand the Repaired Area
Sanding is perhaps the most critical phase for blending the repair into your existing wall. A careful approach at this point ensures a seamless transition:
- Sand using a fine-grit sanding sponge or sandpaper after each layer of compound has fully dried. Employ gentle, circular motions to soften edges and blend high spots into surrounding surfaces.
- Inspect with your hands and eyes. Close your eyes and gently run your fingers across the area, feeling for bumps, ridges, or divots you may have missed visually. Touch-ups are best handled before moving on to the next steps.
- Keep dust to a minimum by using a damp rag to wipe away sanding debris between layers. This helps the primer and paint adhere better, keeping your workspace clean and healthy.
A light touch, paired with thorough inspection, ensures your repair is completely undetectable once it’s painted.
Match the Wall Texture
Wall texture is a subtle detail that can make or break the invisibility of your repair. Replicating the precise finish brings cohesion and authenticity to your final result:
- Identify your wall’s existing texture, whether it’s smooth, an orange peel pattern, or a knockdown pattern. Each requires tailored tools and techniques for an accurate match.
- Reproduce the texture by using a spray texture in a can, a specialized roller, or a spatula for knockdown styles. Test your technique on a scrap board or in a hidden area first, as practice helps you match patterns and refine your results with confidence.
- Pace the process—let the texture dry fully before proceeding to priming and painting. If needed, adjust or lightly sand any excess peaks to achieve a perfectly cohesive look.
Matching the original texture ensures the repair blends seamlessly into the existing wall and is key to achieving a fully professional result.
Prime and Paint
The finishing steps are vital to both appearance and longevity. Proper priming and painting don’t just camouflage the repair—they also protect your work from premature damage and color discrepancies:
- Prime the repaired area thoroughly after confirming the texture is dry. Primer helps the paint adhere smoothly and prevents flashing—the telltale difference in sheen or color where old and new surfaces meet. For more insights, consult painting best practices from the Family Handyman.
- Paint with the original color using the same method as the rest of the room—whether it’s brush, roller, or spray. Feather the paint beyond the repair zones to blend edges invisibly and leave a uniform finish.
- Multiple thin coats are always preferable to a single heavy pass; let each layer dry before applying the next to maintain a consistent appearance.
Meticulous application and careful color matching ensure your repair melds seamlessly into your entire room for a flawless finish.
When to Seek Professional Help
While most small to moderate drywall repairs can be handled confidently by DIYers, some circumstances absolutely warrant bringing in an expert:
- Major damage—if the area is extensive, involves multiple panels, or there’s evidence of water damage —may necessitate professional restoration to restore strength and prevent further deterioration.
- Structural concerns—cracks that run diagonally, appear suddenly, or are wider than a quarter inch could signal foundation settling or structural issues. These cases require inspection and repair by experienced tradespeople, ensuring the problem is resolved at its source, not just superficially addressed.
- Lack of time, expertise, or access to the right tools—If your schedule is packed or you want the quickest and highest-quality result, hiring professionals ensures a smooth and efficient process. Experts, such as those specializing in drywall repair services, guarantee meticulous standards, lasting durability, and safety from start to finish.
Partnering with a qualified repair service provides peace of mind and ensures top-tier outcomes, particularly for complex or urgent repairs.
Mastering drywall repair not only boosts your home’s property value and visual appeal but also grants you confidence in managing future maintenance. With deliberate preparation, the right tools, a steady hand, and a little creative finesse, you’re well-equipped to handle virtually any drywall mishap—and keep your walls looking beautiful year after year.